This chapter contains:
- Enabling the Media Attribution Setting
- Adding Attribution Metadata
Thanks to contribution from BCcampus, users can format media attributions in an automated, standardized way by enabling the Media Attributions setting in their theme options. With the Media Attributions setting on, you can display the attribution metadata of your media files at the end of each chapter of your book.
This is helpful for users who, for example, are creating textbooks and may be using a large quantity of images from different sources.
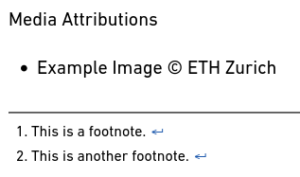
This setting allows attribution information to be displayed at the end of each chapter after your body text and before your footnotes.
11.1 – Enabling the Media Attribution Setting
To enable the Media Attributions setting on your book, follow these steps:
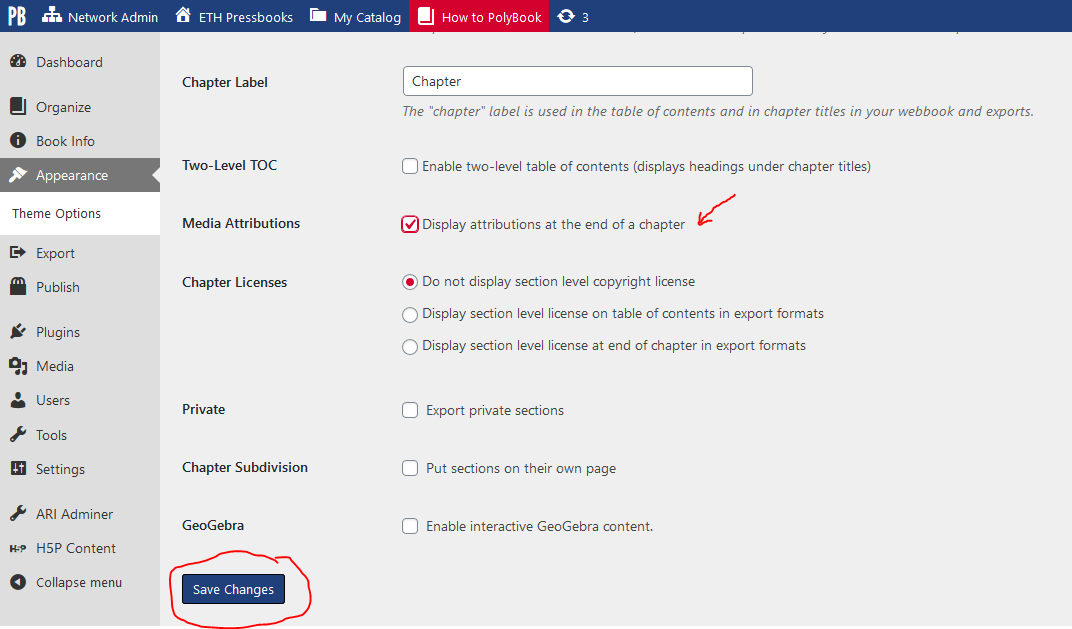
- Click Appearance on the left-hand menu of your book’s dashboard
- Click Theme Options
- In the Global Options tab, scroll to Media Attributions
- Check the box next to “Display attributions at the end of a chapter”
- Click Save Changes at the bottom of the page
Now, you can add your attribution information to each image in your media library.
11.2 – Adding Attribution Metadata
There are two places where you could choose to input your attribution data.
11.2.1 – Through the Media Library
If you upload your media to your media library before placing the image in a chapter, or if you’re entering attribution data for images that you’ve already placed throughout your book, it’s best to edit image attribution data in the Media Library page.
Find your book’s Media Library by going to Media > Library from the left-hand menu of your book’s dashboard.
All media items, including audio, video, and images, will be listed on the Media Library page. To add attribution data to a media file, follow these steps:
- In your Media Library, click on a media file
- Scroll down to Attributions on the right-hand side of the Attachment Details window
- Enter your attribution metadata (such as Source URL, Author, Author URL, License, and more)
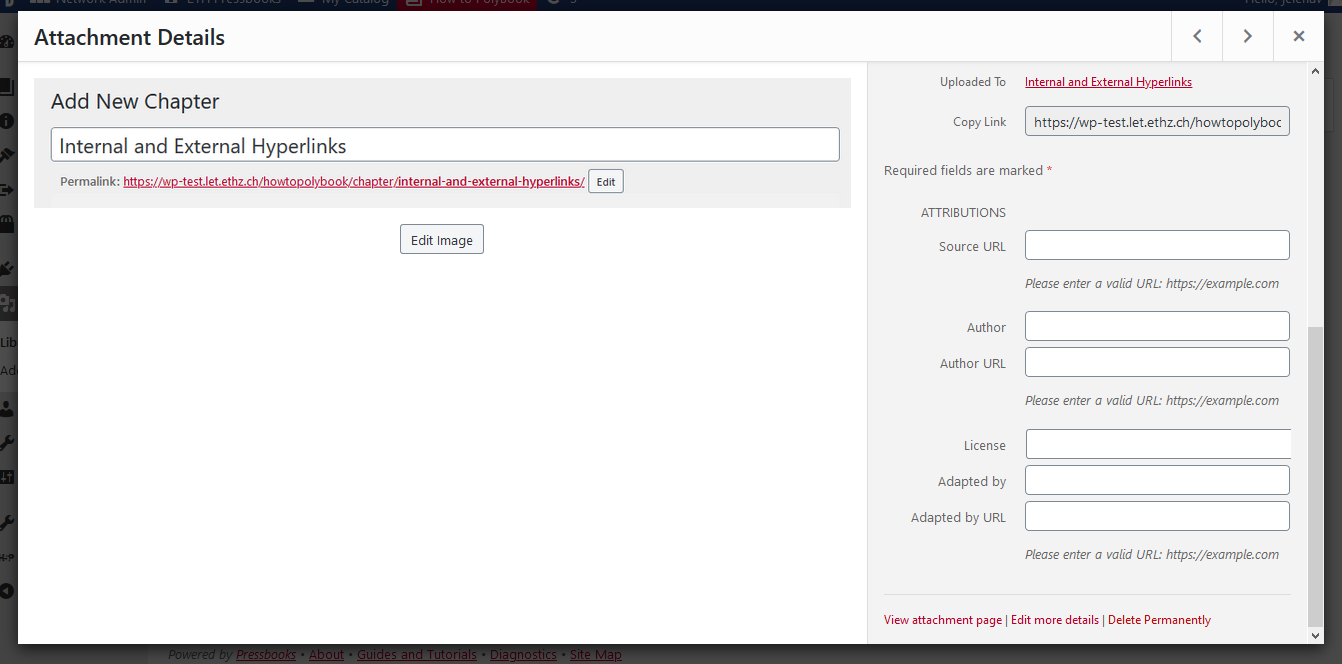
- Exit the Attachment Details window by clicking the X in the corner
Follow these steps for each image that you’d like attribution information included in your book for.
11.2.2 – In the Chapter
If you’re entering images directly into a chapter instead of the media library, you can edit the image attribution inside the Add Media interface in the chapter editor. Follow these steps:
- Click Add Media
- Upload your file
Once the file is uploaded, you’ll be redirected to Media Library screen in the dialog box.
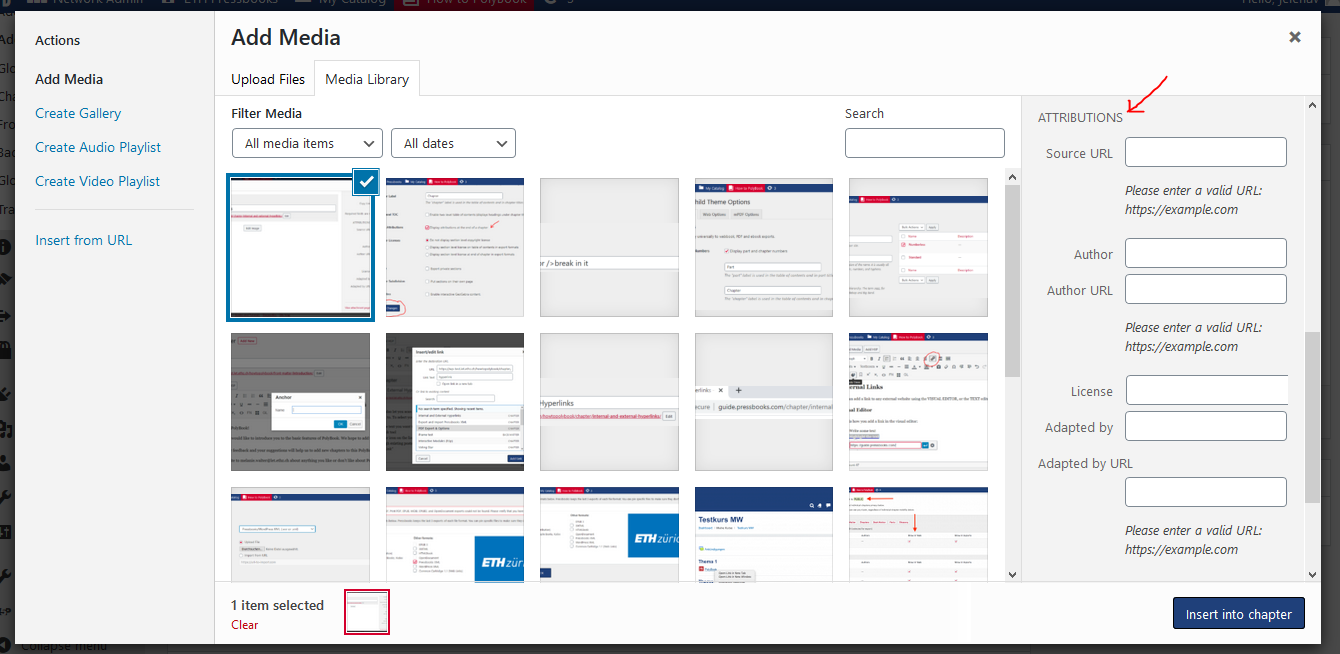
- Scroll down to Attributions on the right hand side of the screen
- Enter your attribution metadata (such as Source URL, Author, Author URL, License, and more)
- Click Insert Into Chapter
Repeat this process for each new image you insert.