This chapter gives information about:
- Uploading images
- Settings when uploading an image
- Changing image settings
- Controlling appearance and placement of an image
- Displaying embbeded images in full screen view»
PolyBook handles images well, for web, EPUB and PDF outputs.
12.1 – Uploading Images
In order to add images, click on the Add Media button in your chapter editor:
Next, upload your image either by dragging and dropping the image file from your computer to the upload box, or by clicking “Select File” to find the file in your computer. You can also choose from existing files in your Media Library.
12.2 – Settings, when Uploading an Image
Finally, you’ll want to select the size of the file, the URL of the file, caption and a few other things. We recommend centering your image, and adding a caption. Once you have added your settings as desired, click “Insert into Post”.
12.3 – Changing Your Image Settings
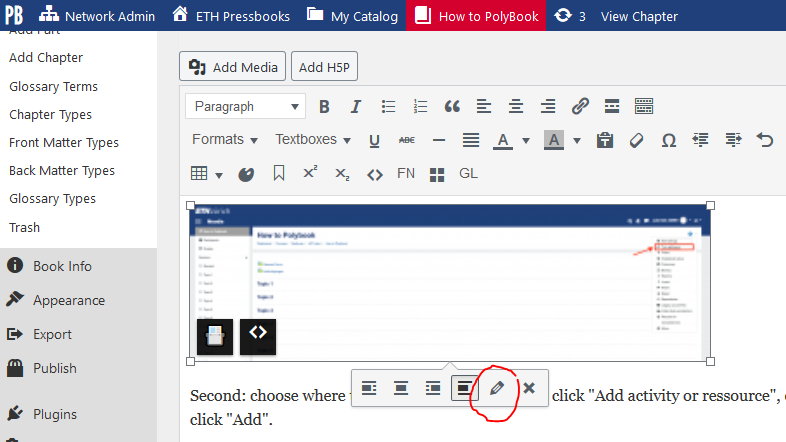
Finally, if you would like to change the settings on an image after it has been added to a post, go to the chapter editor and click on the image. You’ll see a few small icons appear:
- Click on the ‘X’ to delete the image
- Click on the pencil to open the editing screen (see below).
- Click on any of the other icons to change the image alignment.
You can also edit the image caption at any time without opening the clicking on the existing caption and typing as normal.
12.3.1 – Editing Screen
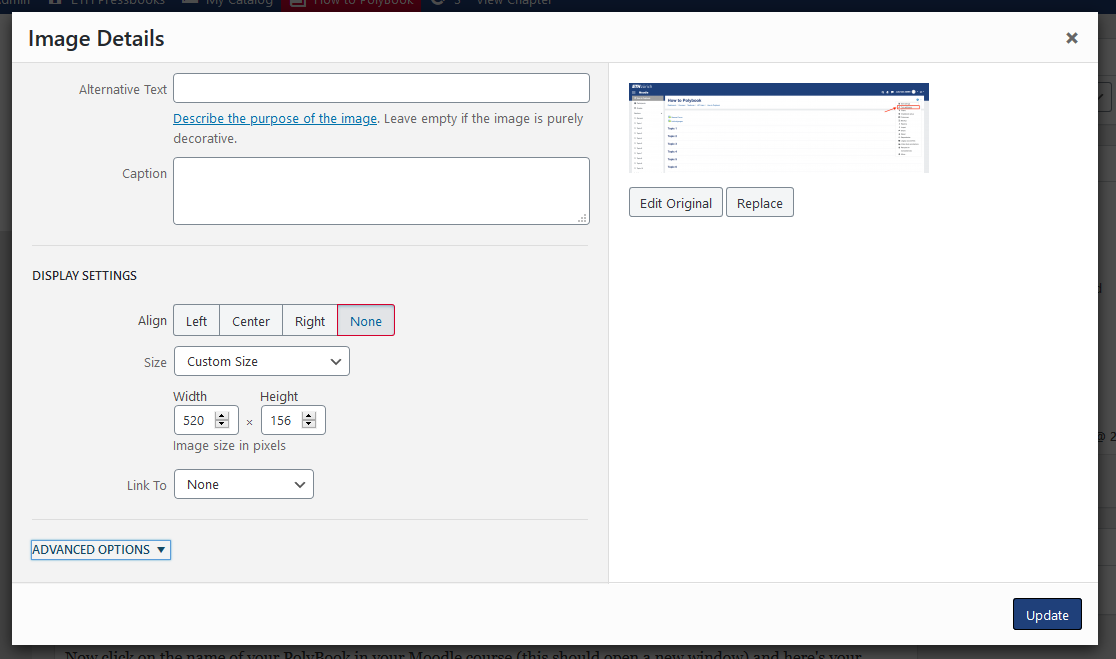
By clicking on the pencil, you open the image editing screen. Here, you can edit the following:
- Caption (note: this is important to include for ebooks especially as images without captions may not render properly in some e-readers)
- Alternate text (this is important for both SEO and accessibility for visually impaired people using screen readers)
- Image alignment
- Image size
- Linking preferences (you can link to the image file, an attachment page, a custom URL or have no link)
- Access the “Advanced Options” and image editor (more on this below)
Make sure to choose an appropriate size for the image itself as well as for the link of the full screen version. Otherwise the image might appear blurred.
12.3.2 – Replacing Images
If you’d like to replace a single image in your chapter, follow these steps:
- Click the Edit pencil icon to open up the Image Details window
- Click Replace underneath the image on the right side of the panel to be brought to the Replace Image screen
- Choose the replacement image from your Media Library or switch to the Upload Files tab to upload a new image in the original’s place
- Click Replace
You’ll be returned to the visual editor with the image replaced.
12.4 – Controlling the Appearance and Placement of an Image
Once you’ve uploaded your image and inserted it where you want it, for best results, you’ll want to give it some styling.
- Once your image uploads, click on it.
- The Attachment Details menu will appear to the right.
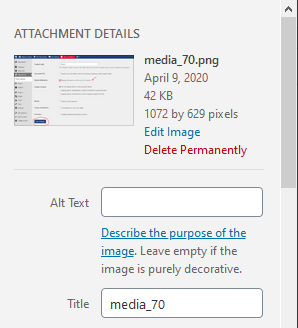
- Critical: Give your photo a caption. Photos without captions will not render properly in all e-readers.
- It’s best practice to write Alt Text, which will be read to visually impaired readers by a screen reader or accessibility device.
- Add a Title and Description for your image here.
- Scroll down.
- Select the preferred alignment for your image.
- Have your image link to itself, or somewhere offsite.
- Choose the size at which your image will display. (You’ll want to know your publisher or bookstore’s specs.)